

How to build a basketball court
A court is only as good as what sits underneath it. The sub-base decides how it plays, how long it lasts, and whether problems surface a year later. Base types, flatness tolerances, drainage, and the mistakes that cost most to undo.
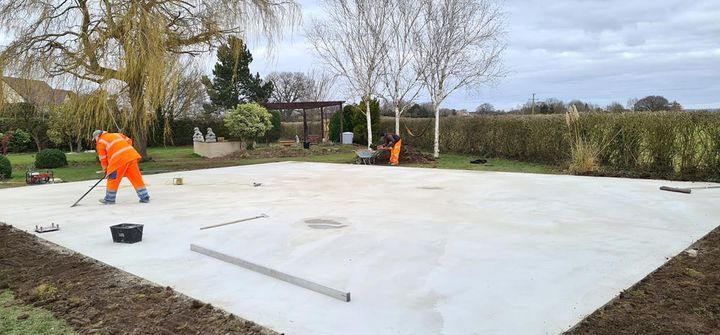
The foundation of a long-lasting basketball court
A basketball court is only as good as the surface beneath it. Long before tiles are clipped together or a hoop is installed, the sub-base determines how the court will perform, how long it will last and whether problems appear months or years down the line.
This guide focuses specifically on building the sub-base for a basketball court. It does not cover surface installation or hoop assembly — those steps come later. Getting the foundation right is what allows everything else to work properly.
What is a basketball court sub-base?
The sub-base is the engineered foundation that supports the playing surface. Its job is deceptively simple: stay flat, stay stable and manage water. In practice, this means carrying player loads, resisting ground movement and preventing moisture from damaging the court above.
For basketball courts, particularly those using modular flooring, the sub-base must be flatter and more precise than a typical patio, driveway or garden slab. Small deviations that would be acceptable elsewhere can cause problems on a court.
Choosing the right type of sub-base
Most basketball courts are built on either concrete or asphalt, with concrete being the preferred solution in the majority of installations. It provides a stable, predictable foundation that supports consistent ball bounce and long-term surface performance.
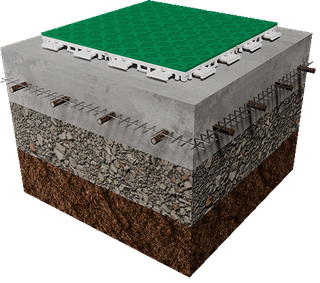
For basketball courts, a reinforced concrete slab should typically meet the following criteria: Minimum thickness of 100–150 mm Steel mesh or rebar reinforcement Laser-levelled finish Subtle fall for outdoor drainage
Asphalt bases can be suitable in certain situations, but they require stricter preparation and are more prone to long-term movement.
Flatness and tolerance requirements
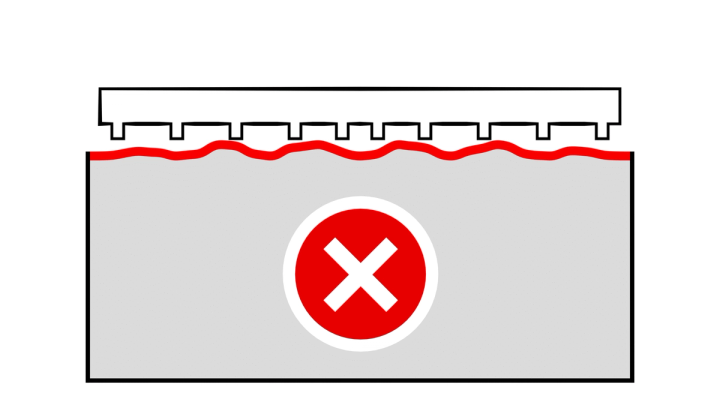
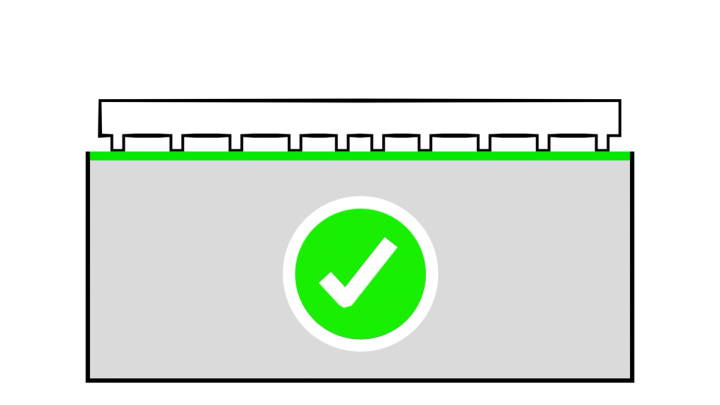
A basketball court surface is unforgiving when it comes to uneven foundations. Unlike paving or general hardscaping, the playing surface amplifies imperfections rather than hiding them. Even minor deviations in the sub-base can affect ball bounce, create uncomfortable footing and make surface installation more difficult.
For this reason, basketball courts require a higher standard of flatness than most exterior slabs. The aim is not visual perfection, but consistent performance across the entire playing area. As a practical guide, a basketball court sub-base should meet the following tolerance expectations:
- No more than 3–5 mm deviation over 3 metres
- No abrupt level changes or ridges
- No standing water after rainfall (for outdoor courts)
Meeting these tolerances at the sub-base stage prevents issues that are difficult or impossible to correct once the court surface is installed.
Drainage and ground preparation
For outdoor courts, drainage is as important as flatness. Water that cannot escape will eventually cause movement, cracking or frost damage.
Good ground preparation typically involves a compacted stone or hardcore layer beneath the slab, combined with a gentle fall to guide water away from the court area. The goal is not to create a visible slope, but to prevent standing water from forming anywhere on the surface.
Ignoring drainage rarely causes immediate failure — it causes slow, expensive problems later.
Sub-base readiness check
Before you move on to installing your basketball court surface, pause and confirm the following. If you can confidently tick every box, your sub-base is ready.
Your sub-base should be:
- Structurally sound, fully cured and free from cracks
- Flat within basketball court tolerances (no visible dips or ridges)
- Dry, clean and clear of debris
- Properly drained, with no standing water after rainfall
- Built to the correct dimensions and orientation for your court layout
If any of these points are uncertain, resolve them before installing the surface. Fixing issues at this stage is straightforward. Fixing them later is not.
OnCourt provides technical drawings and tolerance guidance for contractors building court sub-bases.
Common mistakes to avoid
Most sub-base issues stem from shortcuts rather than bad intentions. Using patio-grade tolerances, skipping reinforcement, pouring without accurate level control or rushing the curing process are all mistakes that compromise the court before it’s even built.
- Using poor tolerances
- No reinforcement
- Pouring without level control
- Installing before full cure
The key principle is simple: fixing sub-base problems after installation is far harder than building it correctly in the first place.
When is the sub-base ready?
Before moving on to surface installation, the sub-base should be fully cured, clean and structurally sound. It must meet flatness tolerances and show no signs of cracking, movement or soft spots.
Once these conditions are met, installing the court surface and hoop becomes straightforward.
Who should build the sub-base?
While many basketball court surfaces can be installed DIY, sub-base construction is best handled by experienced groundworks professionals. This stage requires the right equipment, knowledge of local ground conditions and an understanding of tolerance requirements that go beyond general landscaping work.
OnCourt provides technical drawings and specifications so local contractors can build the base correctly without guesswork. This approach combines local expertise with clear performance standards.
Basketball court sub-base FAQ
The sub-base is the compacted foundation layer beneath your court surface. It supports the modular tile system, absorbs load, prevents movement, and ensures consistent basketball bounce. Without a solid sub-base, the court may shift, have dead-spots or drain poorly over time.
Excavation depth depends on substrate, ground conditions and climate, but typically ranges from 100mm to 250mm. For soft soil or colder climates, you may need to go deeper to prevent frost heave and subsidence.
A common sub-base build-up includes:– Type 1 MOT (crushed stone) for compaction and drainage– A layer of compacted sharp sand or a fine blinding layer– Optionally, geotextile fabric for weed control and stabilityFor best results, finish with a smooth concrete or asphalt pad when installing modular tile systems. As discussed in this article, a flatness tolerance of no more than 5mm in any 3m radius will ensure great performance.
Your sub-base should be level to within 5mm over any 3m radius. This tolerance is critical to ensure that your modular tiles lock securely and provide a safe, consistent playing experience.
Yes. Proper drainage is essential to prevent water pooling under the modular court surface. Incorporate a gentle slope, permeable base layers, or channel drains as needed for outdoor courts.
Yes, if you’re confident with excavation and compaction. Many DIYers handle their own sub-base, but for larger or more complex courts, we recommend working with a professional contractor.
Working with a local groundworks contractor is advisable for most installs. They can assess local soil conditions, understand drainage requirements, and bring the right machinery for accurate levelling. A professionally prepared sub-base reduces the likelihood of problems developing later.
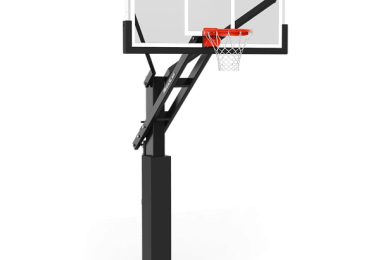
Installing the in-ground MegaSlam hoop is a two-stage job. A 1.25 m deep hole is dug for a concrete anchor. The hoop is then assembled and fitted to the anchor. MegaSlam hoops are heavy by design — plan for at least two people during installation. Learn more about MegaSlam hoop installation (opens in a new tab).
NOTE – Hoop system and component anchor assemblies should be installed during sub-base construction. Configure and order your court, hoop and components to ensure ground anchor assemblies are available during the sub-base build.
Related products
Frequently asked questions
View all FAQs →More questions? Browse the full basketball court FAQ